Thursday, September 30, 2010

Black and White with LV water slide decals

Hi everyone,

Yesterday, I went to Salon de manila to visit my cousin, Tricia. i remembered that salon de manila's fashion guide is London inspired fashion. they are into all blacks, all whites, or black and white colored outfits. so i created a design out of it. i added rhinestones and LV decals to make it more fashionable.


Materials used:
Caronia: Black Velvet
Art Deco: White
Rhinestones
LV Water Slide decals

Thanks for reading and i hope you liked my design

Nail art #11 - Water marbling

I'm not sure I quite like how my water marbling turned out; I really have had better. Somehow the red on white polish gives my nails a rather bloody look.

Polishes used:
Maybelline Colorama Candy Apple
Ulta3 Lily White
water  marbling

I don't like the positioning on my first finger ,and the frustrating thing is that I had quite a nice pattern for it too. I got over-anxious, I suppose :/. Topcoat (Ulta3 Non-chip) also streaked the red polish, even though it was applied after awhile.

Thanks for dropping by.
~shazzii

Wednesday, September 29, 2010

Nailswatches: Harry Potter theme

Hi everyone

I joined Nailswatches nail art contest with a harry potter theme. im not satisfied with my work. well, im not a fan of harry potter so it is kinda hard for me to make an entry out of it. i even forgot to create another entry but still i did my best for this. it's my first time but it's not that bad, isn't it? hehe

Here's my entry

the voting will end on Oct. 10 so if you think my design is good, please do vote for me. here's the link: http://www.nailswatches.com/nailartcontest
(you must be a follower so that you votes may be counted.)

Hope you like it. have a nice day

Nail art Challenge: FLoral entry 2

Hi everyone,

I haven't updated my blog for a week, so i'll be posting multiple stuffs. i posted my first entry for the nail art challenge last week and now for my second entry

for me, the bright base color looks cute on the flowers. my flowers aren't perfect yet it looks kinda weird, im not really good in using acrylics yet but im still on the process of learning, but it looks good though, right? hehe.

so for this weeks challenge "Black and white" is the theme. still can't think of a design yet but i'll post it as soon as i finished my art

i hope you like my design thank you for reading


Monday, September 27, 2010

Nail art #10 - Overflow of silver

Normally when I put in the effort to do nail art, I try to keep my nails as so for at least two days; after all, I did spend a large amount of time on it. Too bad I kept picking at the rhinestones on my previous mani, one popped off this morning and that was enough of an excuse to start from scratch again :P.

Nothing intricate, but I love this mani loads. Hopefully I'll keep this for at least two days :).
nail art1 (1)

Polishes used:
L.A. Colors - Sparkling Diamonds and Jungle Fever
Ulta3 - Snazzle
Maybelline Colorama - Dark Chocolate

Since my thumb nail has finally grown out long enough, I've included it in this photo as well. Still not long enough to file to a squarer shape, but at least it's no longer a nub :P.
nail art2 (1)

Thanks for dropping by.
~shazzii

Victoria's Secret: Cherry on Top

Hi everyone,

Just wanna share this cute nail polish. It's called "Cherry on top" by victoria's secret. my aunt bought me this lovely polish last year, she loves victoria's secret a lot and so am i. i love red polishes and i can say that this counts as my favorite polish.


Looks really hot. one or two coats looks great and it also has a shimmering effect. super cute!

Thanks for reading

Sunday, September 26, 2010

Nail art #9

I felt like some warmer colours today and after much thought decided on OPI's You don't know Jacques. YDKJ is a surprisingly darker shade to what I've seen around, but I love it all the same. I love my dark polishes to bits, I do :). I spiced up my manicure with some nail art; not exactly what I had in mind initially, but I like it all the same.
nail art1

Two coats of YDKJ and three coats of Color Club's High Society. White dots are by Ulta3's Lily White and striping done with Glossyblossom's nail art in White. It isn't as apparent in real life, but wow, that rhinestone on my pinky looks huuuuge o___o.
nail art2

Like I said, this didn't turn out the way I had planned, but I'm not hating it. I just need more inspiration ;~;

Thanks for dropping by.
~shazzii

Saturday, September 25, 2010

Meet me on the star ferry please~

When I heard that OPI had a Hong Kong collection, I was terribly excited. Unfortunately, none of the polishes from this collections appealed to me besides on - OPI Meet me on the star ferry. It looked like such a gorgeous polish from the swatches I had seen and immediately placed an order for it.
MMOTSF1

I was quite disappointed with this polish in that I had expected a lovely purple shade with shimmer. Instead, I got a browned-red almost leaning on purple :(. I don't hate this polish, but I'm not loving it that much either. *sigh*

Here it is with the glorious shimmer:
MMOTSF2

If only it were the purple I was expecting...

Thanks for dropping by.
~shazzii

Friday, September 24, 2010

Candy Apple

I created this design for my fall series that I am doing on my channel. I used a red irridescent glitter acrylic and apple fimo slices as the background and to decorate I sculpted an apple! I really hope you enjoy the design. I got the fimo cane on ebay.


French Rose


Hey Y'all! Ive been busy =D I'll be adding a few more posts so I hope you'll enjoy. This design is a french manicure that I decorated with a pink & white rose I sculpted from acrylic. I also used a pink ribbon with white polka dots that I got from Michaels as the french line. I recently updated my acrylic products & this is the 1st design I made with the new NSI Attraction products.


I hope Y'all enjoy this design! Stay tuned for more designs very soon!


Wednesday, September 22, 2010

A day filled with hauls!

I went out shopping without the intention of buying any polishes, but as always I ended up with a few bottles back home :P.

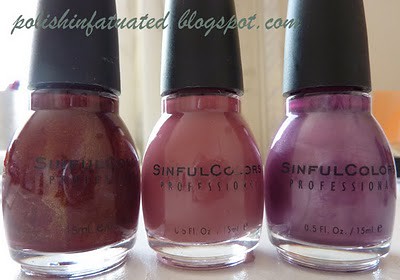
First off, I discovered Sinful Color polishes in The Reject Shop for only 50 cents a bottle!! Of course I had to buy some, even though the colour range was pretty small. It's my first time spotting Sinful Color polishes here in Australia and so I just had to purchase some despite the fact that they were all reds and pinks (and quite a few sheers too).
sinful colors

Left to right: Deepest Ruby, Vela, Noelle


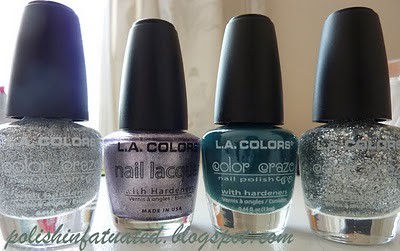
And then too my delight, I also stumbled upon some L.A. Colors polish in a dollar shop! Again, it's my first time seeing these polishes in Australia, so I pretty excited. It was definitely my lucky day today :D.
LA Colors

Left to right: 
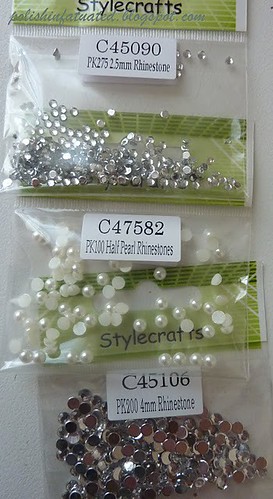
Star light, Metallic purple, Jungle Fever, Sparkling Diamonds

Since I was in full polish buying mode by then, I swung by another dollar shop and bought some rhinestones for future nail art designs :).
rhinestones

Definitely can't wait to try these out!

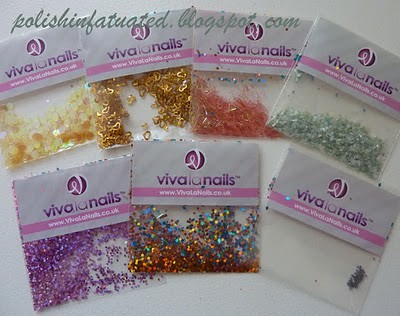
To my surprise, I received a note in the mail when I arrived home telling me to go down to the post office to collect a package. Since I've only ordered one thing recently, I already had a hunch of what was awaiting me at the post office...and I was right! My free blogger package from Viva la Nails had arrived! Can I just say that I'm totally over the moon at the quick shipping?! The package was shipped exactly a week ago, so this only took five business days to arrive!
viva la nails1

I do have a tiny complaint with the packaging though - it appeared that one of the blue glitter packets had not been closed properly and as a result there was glitter spilling everywhere, even out of the sealed packaging. I tried to save what I could and tipped it all into the orange glitter pack. It was quite disappointing and more than a little frustrating to clean all the glitter away - there's still quite a bit in my handbag where I had temporarily stored the package, not to mention my table where I had opened it.
viva la nails2

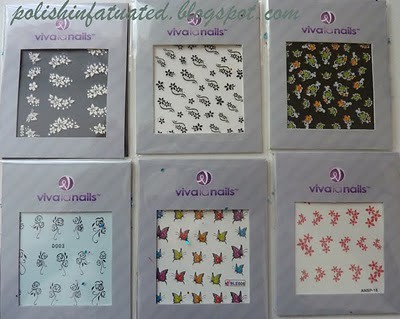
The top row shows the nail stickers and the bottom the water decals. I can't wait to try out the decals, they look so pretty! A review of the products will be coming along in the near future.

Thanks for dropping by.
~shazzii

Tuesday, September 21, 2010

Nail art #8 - Brainy polish?

The first thing that came to mind when I spotted Rimmel's Grey Matter was grey matter = component of brain. No joke. I'm a little surprised that I actually remember stuff from Year 11/12 biology class! But moving on from that.

I had stated some posts back that I had been lemming for some grey polishes for awhile, preferably a crème polish. And to my joy, I discovered Grey Matter when I dropped by Kmart about a week ago. (This also happened to be the time Kmart was having a sale and I was meant to be a good girl sitting at home, studying...) Here in Australia, Rimmel polishes are sold at ridiculously high prices for such tiny sizes of the bottle so I normally don't purchase them. However, as Grey Matter was on sale - only $3.50, what a bargain! - I took the plunge. And boy am I glad I did.
grey matter

Turns out that the grey leans more to an icy-blue shade, but I'm not complaining since I'm totally in love with it. Application was a pain though, I'm not sure if it's just my bottle or the polish but it was quite thick. It took me awhile, but all was good in the end. Two coats, then I decided to add some nail art to it by making use of my dotting tool :).

Polishes used:

Maybelline Colorama - Dark Chocolate
Ulta3 - Lily White
Rimmel - Your Majesty


There's a boo-boo on my third finger due to me getting it caught on something, can't remember what now. That'll teach me to wait for my nails to dry completely before doing anything.

Thanks for dropping by!
~shazzii

To be an upperclassman...

I've been a bad, bad blogger :(. I'm a bit behind on a couple of NOTDs and I just came back with a haul today, so there'll be more posts about them shortly!

So, how to become a part of the upper class? First ladies, you need to be sporting Color Club's High Society. Ok, kidding aside, this polish is such a delight to apply and an even greater delight to wear. I just can't believe I didn't wear this any sooner!
High society

This is two coats with topcoat, although I admit it could have done with a third coat. Under certain lighting and angles there was slight VNL. And a ridge-filler basecoat may have been a good idea too. However, I was absolutely in love with this polish. It is a lovely mushroom taupe crème which I don't own so far, so I am quite a bit besotted with it, lol. If it weren't for the ugly ridges apparent, I may have worn it longer.

Thanks for dropping by!
~shazzii

Nail art Challenge: Floral

Hi everyone

just wanna share you my entry for this weeks nail art challenge.
last week's fab nailart's challenge theme was Anything Goes. for this week, their theme was Floral (love it). this time, i made a simple but elegant styled art.

i had so much fun while doing this. maybe because im inspired at that time. i got so excited and made my entry too early (i already did submitted it too). fab nailart's weekly challenge allows us to submit 2 entries and im planning to do another one. Yipey! after doing my 2nd work i'll share it to you guys.

Thank you for reading

Nail art Challenge: Anything Goes

Hi everyone


Last week, ThRiSzHa and Mae, started out their weekly nail art challenge. I've been busy during that week so i forgot, as in, I Completely forgot about it. while checking out my facebook, that was a friday night, i saw the tagged picture of the said challenge, Oh No! the deadline is tomorrow and i still haven't made my entry yet. since i have no more time to do it, and i'm really tired and exhausted that time, i decided to submit my past work. i choose the simplest one. and here it is

Simplicity is beauty

the polishes that i used are: the L.A Girl black light nail polish disco brites (Red), Elianto Yellow, Art Deco forest green and Art Deco Silver glitters.

Thank you for reading

Dealing with cracked nails

hi everyone

Isn't it annoying when your nails got broken? 'coz for me, I really really really hate it when my nails got cracked and broken. i'm forced to cut my nails which makes it shorter, and for me designing nails would be much better with long nails (short nails are good but designs are limited).

Oh no!! I'm just starting to grow my nails and now what? so sad =(

so to deal with it i did a little research and found out that you can temporarily fix it without even cutting your nails. Yay!! and all you need is a Tea Bag. Yes, a TEA BAG!


just pour out it's content and cut and shape the paper like thing to the shape of you broken nail. condition your cuticles by applying a cuticle oil on your cuticles and massage it, then apply a nail hardener to strengthen your nails.

i used Bobbie Cuticle Oil with avocado extract, almond oil and Vitamin E
i used Caronia's Nail hardener and Base coat


while the base coat is still wet, placed the shaped paper unto the cracked/broken nail and seal it with a top coat.

Fresh and clean nails, looks Great. Now, you can also wear your favorite nail polish if you want and you're done.

Thanks for reading

Thursday, September 16, 2010

China Glaze - IDK

Woohoo, it's finally time to relax! I'm officially on two weeks of break from Uni, so that's pretty awesome :). Hopefully, this means more time for nail art, which I'll great around to by the next post. Today however, I decided to wear some holo polish to complement my bright and chipper mood.
IDK

Two coats of China Glaze's IDK with topcoat. Gorgeous, as with my previous two holo polish experiences, and I really can't wait to get my hands on more of them. Especially now that Australia's entering summer, it'll mean lots of sun, sun, and sun (although I can really pass on the heat...)!

Thanks for dropping by.
~shazzii

Monday, September 13, 2010

Nail art #7 - Yummy yummy, for my tummy

Cupcake nails! Kind of fitting, since it's my birthday today :).

Polishes used:
Base - Ulta3 Waterlily
Cupcake base - OPI Here today...Aragon tomorrow
Icing - Ulta3 Lily white
Sprinkles - China Glaze Light as air, Ulta3 Spring shower & Spring fling
Cherry - An unknown red polish and China Glaze Re-Freshmint
cupcakes

These nails were extremely easy to do; possibly a fail-safe nail art design! I had been looking around on youtube for some tutorials and many opted to use dotting tools or toothpicks to draw their icing. I was being lazy on the night I did my nails though, and decided to simply apply the icing (white polish) straight on with the nail polish's brush. You can see some of my cupcakes turned out slightly sloppy looking, but I think that's fine since cupcakes in general don't look perfect (at least my ones don't!).

Every time I look at my nails, I feel a craving for cupcakes. Mmmm, icing... :D. I'm not doing much for my birthday since I'm lucky enough to have two tests in the following two days (sarcasm), but hopefully I'll be celebrating with my family on Friday night. I've been feeling like some lovely Beijing style Chinese for some time now :).

Ok, back to some more studying before I call it a night.

Thanks for dropping by!
~shazzii

Saturday, September 11, 2010

Nail Art Through the Ages-1940's Inspired Nail Art

Hey Y'all! I recently got the opportunity to participate in a HUGE collaboration with dollface22772 on youtube! This was great fun! The theme for the collaboration was nail art through the ages. We were asked to come up with designs based on a specific decade. I requested the 1940's as my inspiration. Be sure to check out all the other fabulous designs for each era!

To create this look, I used a purple glitter mix and a lilac lace ribbon. I created a white and purple flower with a lilac swarovski crystal as the decoration. I hope you all enjoy this design!